
Moksha Basics
Page Contents
Moksha Basics
Organize your Tasks with Virtual Desktops
Virtual Desktops allow you to group applications of a certain type on one desktop and those of a different type on another. You initially have four virtual desktops, but you can change this number.
The Pager gadget on the shelf shows small graphics of the available desktops with the applications running in each.
There are several ways to switch among them:
- With the Pager gadget, simply click on the graphic of the desktop you wish to be in
- Use the keyboard shortcut: <Ctrl>+<Alt>+<ArrowKey> in the direction you wish to move
The Entire Desktop is the Menu
A left-click on any empty space of the desktop will bring up the Main Menu. From here, you can launch applications, adjust settings, shut down the system, and so on. This behavior is standard on Bodhi Linux and most users find consider it very convenient. For the few that do not, the mouse-binding Show Main Menu, can be easily removed/configured in Main Menu > Settings > All > Input > Mouse Bindings, along with any other mouse-bindings.
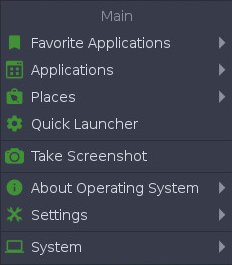
Right-clicking an empty space on the desktop will bring up the Favorites Menu. Since there are no Favorite Applications by default a fresh Bodhi Linux installation, the Favorites Menu will not show on right-click. It is waiting in anticipation for you to add applications! To do so, go to Main Menu > Settings > All > Apps > Favorite Applications
Many Gadgets Show System Info
Gadgets perform a wide variety of functions. Many display system information, such as battery level, time, or CPU frequency. Others allow you to interact with the system in some way, such as adjusting the volume or the screen brightness. Most gadgets allow multiple instances in different locations, for instance on a shelf as well as on the desktop.
Gadgets can be found and added to the desktop via Main Menu > Settings > Gadgets
![]()
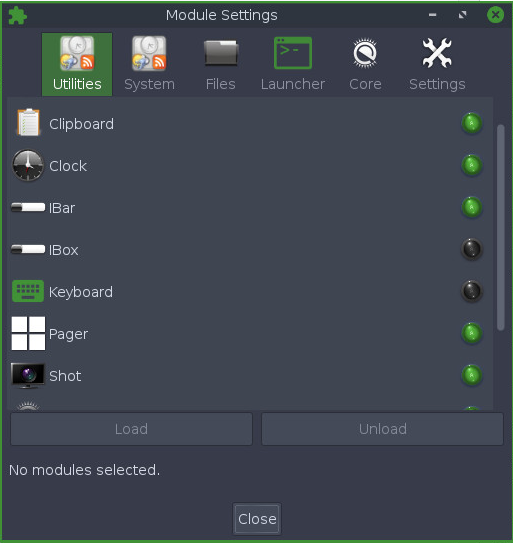
Modules Control Gadget Availability
A gadget will be available only if its module is loaded. Put simply, a gadget is an instance of a module. To load/unload modules, go to Main Menu > Settings > Modules. Bodhi Linux comes with a wide selection of modules installed by default, and more can be installed at your discretion through the Bodhi Linux AppCenter and Synaptic Package Manager
Shelves – The Taskbar/Systray/Dock’s Home, Sweet Home
Moksha provides shelves to house your gadgets and launchers – a convenient alternative to having them on the desktop (that is, most gadgets can be added to shelves) Shelves can be located anywhere on a border of your desktop, and you can have more than one shelf on a desktop as well as different shelves on different virtual desktops. Managing the number of shelves as well as their location, size, and other attributes are done under Main Menu > Settings > Shelves. To manage the content of a shelf (i.e. its gadgets), right-click on the shelf, and choose Shelf > Contents. From Shelf Contents, many gadgets may be loaded, (shown below).
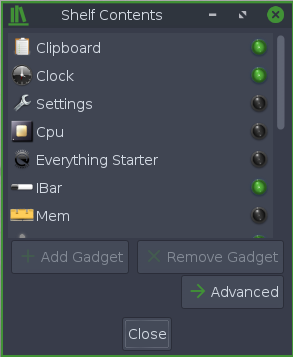
Below: An example shelf with gadgets
![]()
Shading – Alternative for Minimizing
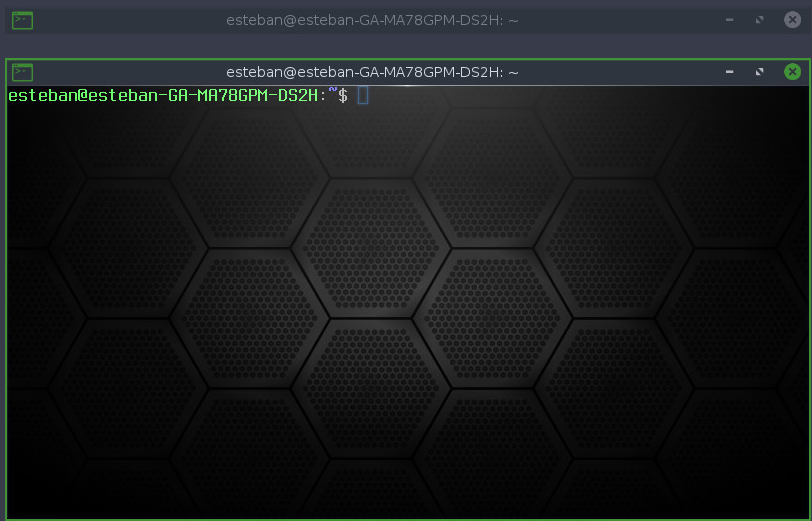
Want to get a window out of your way but don’t want to minimize it to the taskbar? Then Shade it! Just double-click the title bar of any window to roll it up, and double-click the title bar to roll it down again, just like a window shade!
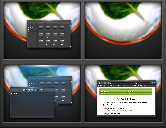
The screenshot here shows two instances of Terminology, Bodhi Linux’s default terminal emulator, one that is Shaded and one that is not.
Desktop Icons
By default (out of the box) Bodhi Linux doesn’t support desktop icons, keeping with a clean/minimalist look and feel. If your preference is to have desktop icons, you can enable this feature via customization in Module Settings.
Enable
There a number of methods to open/access Module Settings:
- Quick launcher: Press <SuperKey>+<Space> to open the Quick Launcher. From within the Launcher the type “Modules” and hit <return>.
- Main Menu: Left-click on any empty space of the desktop to bring up the Main Menu. From the menu click: Settings > Modules this will open the Module Settings window.
With the Module Settings window open, if it’s not maximized, maximize it now. Using the icons at the top of the window to navigate through the features, locate, and click Files. From the list of options under Files, ensure Desktop Icons is enabled by highlighting the option and click the Load button (bottom left).
Of course we have this button, it just isn’t part of the Moksha Core!
To add it:
Open Terminology and type:
-
sudo apt update
then
-
sudo apt install moksha-module-deskshow
Load the module in menu-setting -> modules and place module gadget on the Shelf (right mouse click on Shelf->Contents)
You can also do the same with keyboard shortcut: CTRL ALT D
Disable
To disabled desktop icons, open Module Settings (see above), highlight selected Desktop Icons, click Unload.
Create Desktop Icon – For an Installed App
To run an application from a desktop icon, you must copy its launcher into your Desktop folder (~/Desktop). Most installed apps come packaged with a launcher, (i.e. a “.desktop” file). These files will be found in one of two places:
~/.local/share/applicationsin the case of a personal application launcher/usr/share/applicationsin the case of a standard application launcher.
Copy your chosen launcher (for example: /usr/share/applications/leafpad.desktop) into your Desktop folder (~/Desktop), if you have enabled Desktop Icons (see above) you will now have an icon (launcher) for the Leafpad app on your desktop.
Create Desktop Icon – For a Folder
A launcher (.desktop) file needs to be created and, unsurprisingly, there is a Personal Application Launcher & Desktop Entry Editor (DEE) to help facilitate this.
With Desktop Icons enabled (see above), we first need to establish the path of the folder you want on display on the desktop. If you know the path already, skip to the next paragraph. Using Thunar (file manager) select your chosen folder or file. From the file manager toolbar, you’ll now see the full path. In this example, we’ll be creating a shortcut to the Downloads folder (the path is: /home/<username>/Downloads), where <username> is replaced with your Bodhi Linux username (i.e. jane). Make note of the path as you need it later
Tip: highlight and copy the file path and hit: <ctl>+<c>
The Desktop Entry Editor (DEE) is accessed via the Personal Application Launcher (PAL). Using Quick Launch (<SuperKey>+<Space>) open the PAL by typing “personal” and hit <return>. In the PAL window click Add, to open the DEE. The DEE needs the following minimum information:
- Name: The icon name to display on the desktop. In this example, we’ll use “Downloads”
- Application: As we’re opening a folder, we’ll use Thunar passing in the path obtained earlier as a parameter. In this example this becomes:
thunar '/home/jane/Downloads'
Note: Quotes are only mandatory if the path includes spaces
Now click the Icon link in the top navigation of the DEE window to select a suitable icon. Simply type “folder” into the Icon text box (located above the Ok, Apply & Close buttons) you will see a preview of the icon appear. You can also navigate to icons under /usr/share/icons/<theme name>/status/scalable/ but this is beyond the scope of this how-to.
See Personal Application Launcher for more info.
Now click the Options link in the top navigation bar of the DEE window and uncheck the Show in Menus option (as we do not want this action).
Now press Apply to save the newly created .desktop file (the file will be saved in ~/.local/share/applications) and named using the name you specified in an earlier step above. Now click Close to exit the DEE.
Finally, copy your newly created .desktop file, in this example: ~/.local/share/applications/Downloads.desktop, into the folder: ~/Desktop
Changing Themes (Desktop, GTK, or Icon)
For more information on this topic see: Changing Themes
ARandR (aka display management)
<ARandR is the graphical configuration utility (RandR: Resize and Rotate). It can be used to set the display size/resolution, orientation, or reflection of the outputs for a screen. This is also used for configuring one or more monitors.
There a number of methods to access ARandR:
- Quick launcher: Press <SuperKey>+<Space>, to open the Quick Launcher. From within the Launcher the type “ARandR” and hit <return>.
- Main Menu. Left-click on any empty space of the desktop to bring up the Main Menu. From the Main Menu click: Applications > Preferences > ARandR – this will open the Screen Layout Editor window.
With the Screen Layout Editor window open, if it’s not maximized, maximize it now.
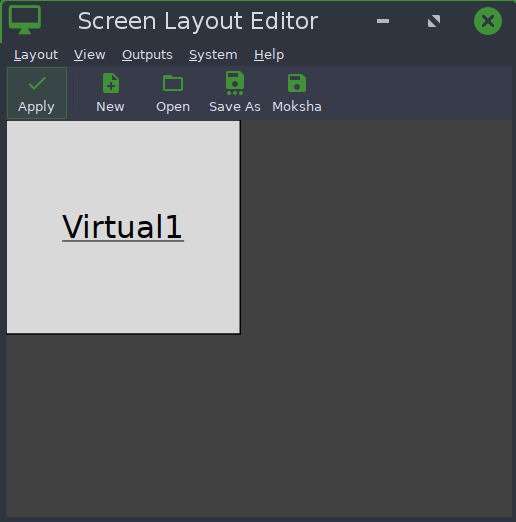
Change Display Resolution
Select your chosen display output from the main panel or from the settings menu: outputs. If you have multiple displays you will see multiple display outputs. Using the output from the panel as our example, a right-click will pop up a context menu. Click Resolution and select one of the available resolutions, then click Apply from the toolbar. If you want the change of resolution to persist after a reboot click the Moksha icon from the toolbar.
Handy Shortcuts/Bindings:
Shortcuts are referred to as Bindings in Moksha and can be actioned – e.g. clicking the mouse at an edge of the screen, pressing a key combination, or pressing a key+mouse-click. They are categorized as follows:
- Edge Bindings (edges of the screen)
- Key Bindings (keyboard, i.e. keyboard shortcut)
- Mouse Bindings (mouse+key)
- ACPI Bindings (events)
You can set up your own bindings, but many have already been set up by default. Some of these are shown below.
Tip: For more details on bindings see the wiki page: Key & Edge Bindings
Alt+<left-click> (mouse)
allows you to click anywhere in the window to grab it and reposition
<left-click> (mouse)
on an open portion of the desktop, opens the Main Menu
<right-click> (mouse)
on an open portion of the desktop, opens the favorites menu
Ctrl+Alt+X (key)
closes a window
Ctrl+Alt+<ArrowKey> (key)
switches to the Virtual Desktop in the direction selected
Ctrl+Alt+M (key)
brings up the Main Menu
Shift+F10 (key)
maximizes a window vertically
Alt+Shift+F10 (key)
maximizes a window horizontally
Alt+Tab (key)
switches between windows on the same desktop
All bindings can be located and configured at:
Main Menu > Settings > All > Input
Bodhi Linux Home
Bodhi Linux – Wiki Home Page
Bodhi Linux – Wiki Table of Contents